Pro2Pro is an online resource center dedicated to enriching the careers of licensed beauty professionals.
Brow Lamination Tips | How to Laminate Brows

As bold, fluffy, lived-in brows continue to reign supreme, more and more beauty pros are adding brow lamination to their menus. Brow lamination offers a longer term solution than alternative enhancements and is suitable for the vast majority of brows-even individuals with sparse to moderate hair can benefit from the treatment.
Curious about the brow lamination trend? Learn more about brow lamination here!
Why Should You Learn How to Do Brow Lamination?
“From a professional perspective, lamination has a high ROI, given the appointment time to product/service cost ratio,” says Brow Educator + Founder of Detroit Beauty Collective & Behold Brows Brittany Waters.
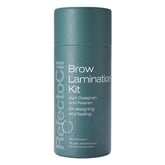
Brittany first learned about the brow lamination technique in Europe, and quickly mastered the craft, bringing it to her studio in Detroit. Below, Brittany gives us her comprehensive, step-by-step guide to brow lamination plus brow tinting (the perfect upsell to your lamination service and a great way to really make your lamination shine). Follow along for all of Brittany’s best pro tips for brow lamination!


How to Laminate Your Clients’ Brows
Wipe off any excess hair.
Use a gentle cleanser to remove any residual oils or existing makeup.
Using a doe foot wand, apply your perm solution, completely covering the brow. This first solution softens the cuticle and breaks down the bonds in the hair, allowing you to redirect the hair and/or fan it out to give the appearance of a fuller brow.
Comb through with a mascara wand to make sure each hair is completely coated. Remove any excess product from the skin with a cotton swab.
Apply cling wrap and allow the solution to process. Make sure the wrap is nice and tight, then go through and gently press to make sure there are no air bubbles. Set a timer for anywhere between 10 and 15 minutes, depending on the texture of your client’s hair, starting at 10 minutes for fine hair.
At the halfway mark, go back in and shape the hair with a dental brush one brow at a time.
Brow lamination pro tip: make sure not to press down on the skin, which could irritate the skin when the solution is on.
At this point, start to create a natural curve in the brow shape so that all the hairs don’t stick straight up. If you feel like the brows are getting dry as you brush through, add more of the solution. Re-apply the cling wrap.
Brow lamination pro tip: If at any time throughout the process you come across stubborn hairs, use the doe foot wand to really push the hair down and go over it multiple times.
With about one minute remaining, remove the wrap once more and comb through with the dental brush to make sure all the hairs are where you want them.
Once the time is up, remove the wrap and the solution using a wet cotton round. You should cleanse in the same direction you set the hairs. Comb through with a dental brush once more. If there are stubborn hairs that won't take to the solution, leave the wrap on for a few more minutes.
Using a doe foot wand, apply a generous amount of neutralizing lotion, making sure there is an even amount throughout the hair. The neutralizer repairs the bonds that were broken by the perm solution by bringing the pH back to where it was before. Remove any excess product from the skin with a cotton swab.
Occlude the neutralizer with cling wrap. Allow to process for the same amount of time as the first solution (in this case 14 minutes).
At the halfway mark, remove the wrap one brow at a time. Comb through with the dental brush and separate the hairs, evaluating if any stubborn hairs need more product.
After 14 minutes, remove the wrap and the neutralizer using a dry cotton round. The brows are now in the shape you want them to be and the bonds have been repaired, so you don't want to add any moisture.
Use a clean dental brush and comb through, making sure to separate the hairs. They will naturally want to stick together, so make sure to thoroughly comb through, curving the brush in the direction of the shape you want.
Now it’s time to shape the brows.
Brow lamination pro tip: apply highlighter or concealer to the bottom of the brow to create a guide for your shaping. Pluck along this line, and trim any longer hairs around the brow. Your highlighter line will also give you a crisp line to follow when it’s time to tint.
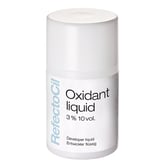
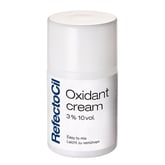
Mix RefectoCil Eyelash & Eyebrow Cream Hair Dye (natural brown was used here) and Refectocil Oxidant 3% Developer Cream, making sure to smooth any lumps. Starting from the bottom and tail area, apply an even coat of tint. Try to apply it as cleanly as you can, but remove any excess tint using a cotton swab. Process for 5 minutes on each brow. Any time you tint over a lamination, you should cut down your processing time.
Remove the dye with a dry cotton round, wiping in the same direction as the hair. Using the dental brush to brush through the brows and separate the hairs. Apply a conditioning treatment and brush through once more.
| SHOP: | www.marlobeauty.com |
| SHARE: |


.jpg)
