Pro2Pro is an online resource center dedicated to enriching the careers of licensed beauty professionals.
Step-By-Step: Razor Cut Bixiefeaturing Jatai

The bixie is officially shaping up to be the cut of the season - especially as celebs and influencers start to go shorter for the summer. A cross between a pixie and a bob - usually cut with a razor and featuring lots and lots of layers - this cut takes a little bit of practice. Luckily, Jatai Educator and bixie expert Erika Hawkins stopped by @MarloBeautySupply’s Instagram to demo the trending cut and answer the most commonly asked bixie questions beauty pros have. Grab your razor and follow along to master the look your clients will all be asking for this year!
Bixie Step-By-Step
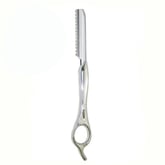
1 Create a 1” horseshoe parting around the front hairline. Choose a suitable length for the bangs. Start with a small section in the middle of the forehead. With the Jatai International Feather Plier Razor, carve a “V shape” into this section for texture and to establish length for the fringe. Repeat this step with another small section on either side of the center, overdirecting each section slightly toward center to encourage a slight round.
2 Use a short stroke with the razor to continue the bang section from center out to sides of the head toward the recession areas. Your cutting line should remain horizontal. Use length at recession area to create side framing pieces. Elevate hair at the sides of the face and overdirect forward. Cut short to long to the end of the section. Be sure to establish a length you like for the sides, as this will serve as your guide for your graduation through the sides later!
3 Take another horseshoe parting and repeat these same steps to create a deeper bang section.
4 To create layering on top of the head, take horizontal partings from one side of the head to the other, stopping at the parietal ridge on either side. Elevate each section. Remove weight as needed. Use a horizontal cutting line with a medium-to-large stroke with your razor to create texture. Repeat using 1” sections until you reach the whirl toward the back of the head where the growth pattern changes.
5 For added weight removal, you can revisit these layers on the top of the head using sections from the back of the head to the front bang area. Elevate 90 degrees from the head and cut small “spears” short to long out of any areas of high density.
6 Apply a small amount of One 'N Only Zero Fuss Styling Balm to cut hair to air dry while you work on the rest of the haircut.
7 Move to the back of the head. Along the back hairline, use diagonal sections from the mastoid process behind the ear toward the bottom hairline to begin your round graduation. Work toward center back using a medium stroke with your razor. Pull each section toward you. Repeat on the other side of the head. Check for balance.
8 At the occipital bone, you can begin taking horizontal sections from the center back toward the ear. Use the section below as your guide for length. Pull the guide section directly out from the head, then comb the section you are cutting down to your guide section and let your guide section fall out. Remove weight as needed through dense areas. Then with a medium-to-long stroke, create a horizontal cutting line working from center to the back of the ear. Continue working up the head in this manner until you reach the crown area at the top of the head.
9 Connect the length behind the ear to your guide length in front of the ear (you established this length when you cut your face-framing pieces at the beginning of the haircut.). Using diagonal forward sections, cut from the ear toward the front hairline. Remove weight as needed. Continue taking diagonal sections, elevating to the previous section. Repeat on the opposite side of the head.
10 Move to the crown area around the whirl. Use radial (pie) sections with the whirl as your center. Elevate each section 90 degrees from the head. Cut short to long, connecting lengths to the layers and graduation for a soft, yet connected result.
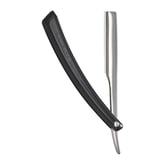
11 Use a Jatai International Feather Styling Razor to detail the hairline at the nape.
12 Apply Rusk Designer Collection Wired Flexible Styling Crème and diffuse the hair. Finish as desired.
Your Bixie FAQs, Answered!
What’s the difference between a bixie and a short bob?
I do feel like these haircut names are more like vague ideas, which gives us lots of room for our own interpretations! To me, a bob at any length will be closer to one length (or maybe with graduation), but a bixie will include lots of layers. I’ve seen some people use the term “bixie” for long pixies, tiny shags and mini G-bobs. I try not to get too caught up in a name and focus more on suitability for the client at the end of the day!
Would you recommend this cut for straight hair or textured hair?
You can do it on straight, wavy or curly hair! The only thing that would change is how much weight you take out.
Do the occipital bone and parietal ridge affect your sectioning?
They don’t have to affect your sectioning, but being aware of where they are and how that affects the way the head is rounding away or toward you in certain areas might affect the shape you’re creating. I think you just always need to be aware of the head shape, but that doesn’t mean you need to change your sectioning.
What are some tips for cutting curly hair with the Plier Razor?
Use lots of tension! I love how the razor can create lots of movement in curls! But if you feel their cuticle doesn’t feel right with the razor, trust your instincts and grab your shears.
Is the razoring technique with the Plier Razor - the way it's held and the positioning of the blade - the same as with the Feather Razor?
The handle of the Plier is very different from the Feather, and the razor does not have a guard (although you can get guarded razors for the Plier now which are great for practicing!) The way you hold the razor is a bit different and in my opinion, you have more flexibility with the Plier because of this.
Is it better to razor wet hair or dry hair?
I use the Plier Razor on wet hair to ease any friction between the hair and the blade. And lots of tension while cutting!
What’s the biggest mistake you can make when cutting with a razor?
Probably not using enough tension when cutting. If you’re not using enough tension, you’re not going to be able to cut the hair cleanly.
Watch Erika do the full cut!
| SHOP: | www.marlobeauty.com |
| SHARE: |


